Have you ever had a situation where you felt that no matter what, you couldn’t make the inside of a garment look neat and tidy?
I was taught in my early years of sewing that the inside of the garment needed to look neat and tidy. In fact, I was a 4-Her. We entered our garments to be judged every summer at the county fair. If your garment was really well done, you received a blue ribbon. This was no small feat. You had to have your garment look almost as nice on the inside as on the outside.
I was 9 years old when I started. I continued to be in 4-H until I was a senior in high school. It wasn’t until my last year that I received a blue ribbon. Was it because I was a poor sewist? No. Was the competition stiff? You bet. It was the 70s, and it was Racine County in Wisconsin. That’s a pretty populated county, and a lot of young people were sewing garments back then. If someone received enough recognition from the judges, your garment could actually go to the State Fair! THAT was a big deal. I never did get to that level.
If you wanted a blue ribbon, you had to work very, very hard. I am pretty sure that they had a quota, and they could only give out so many. I worked really really hard. I did get a lot of second place ribbons. Your garment had to be perfect, and I mean perfect. The standard was that the seams needed to be neatly and perfectly finished on the inside. Everything had to lay just perfectly. Polyester gabardine was huge back then. Everything was made from it and it raveled something fierce.
Since then, I have never had the stomach for a raw edge. Isn’t that funny? People make those rag quilts and they’re fun and cute and fuzzy, but I can’t stand to look at them because of all the raw edges. People do raw edge applique’ and leave it as is and I can’t stand it. Yes, it’s beautiful, and it makes for a gorgeous art quilt. Nancy Zieman did a lot of raw edge applique, and she’s a Goddess in my book. But, I just can’t bring myself to do it. They beat it in me and it worked well.
So I was working on the Baseball Skirt, by Sew DIY. I love this pattern because it’s a cute skirt and looks great on anyone. However, the pattern instructions do not discuss how to do any seam finishes.
I don’t like to get on my rant about really young people doing patterns–but here it is. If you haven’t had the experience of competition in your past, you don’t really know what makes a garment truly professional or tailored. Or, if you haven’t had formal education in sizing and finishing, sometimes the patterns just don’t work out.
So, I would like to add my own advice about this pattern. Line it. This goes for other patterns as well as this one. You don’t know how to line something? Well, I am going to give you some short tips and tricks and you can start to try it, little by little.
A garment doesn’t have to be fully lined in order to make it look finished. You can line all of it or just sections.
For instance, look at this skirt. This is the fully completed version of this skirt.
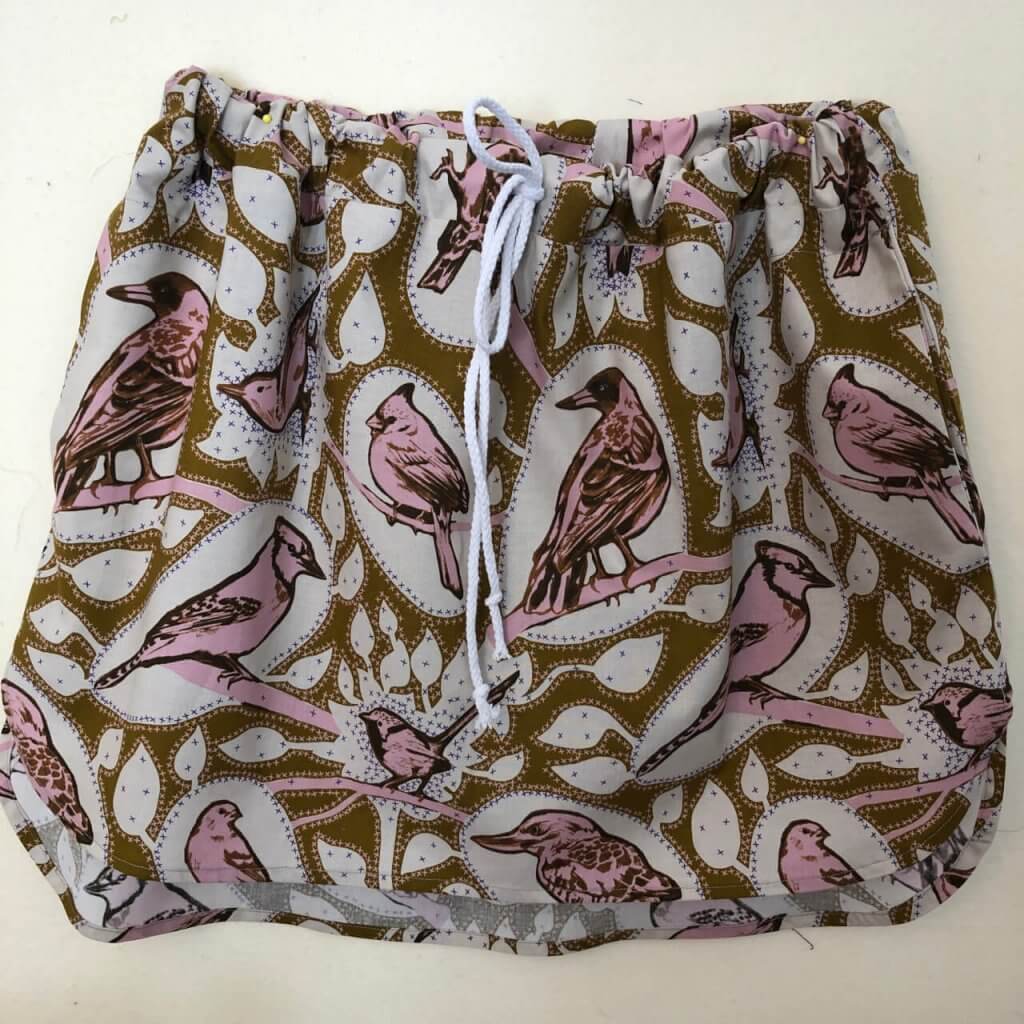
I love that the back side of this skirt is slightly longer than the front. That adds interest. And, it has a curved hemline. That also adds style and interest. But this presents a problem for seam finishing.
There are also side pockets in this skirt. Awesome. Again, a problem for finishing the seams neatly. The pattern suggests that you clip the seam allowance. This is frequently done when you want to move from one type of seam finish to another, so that you can disassociate the two.
Here’s where the problem lies…
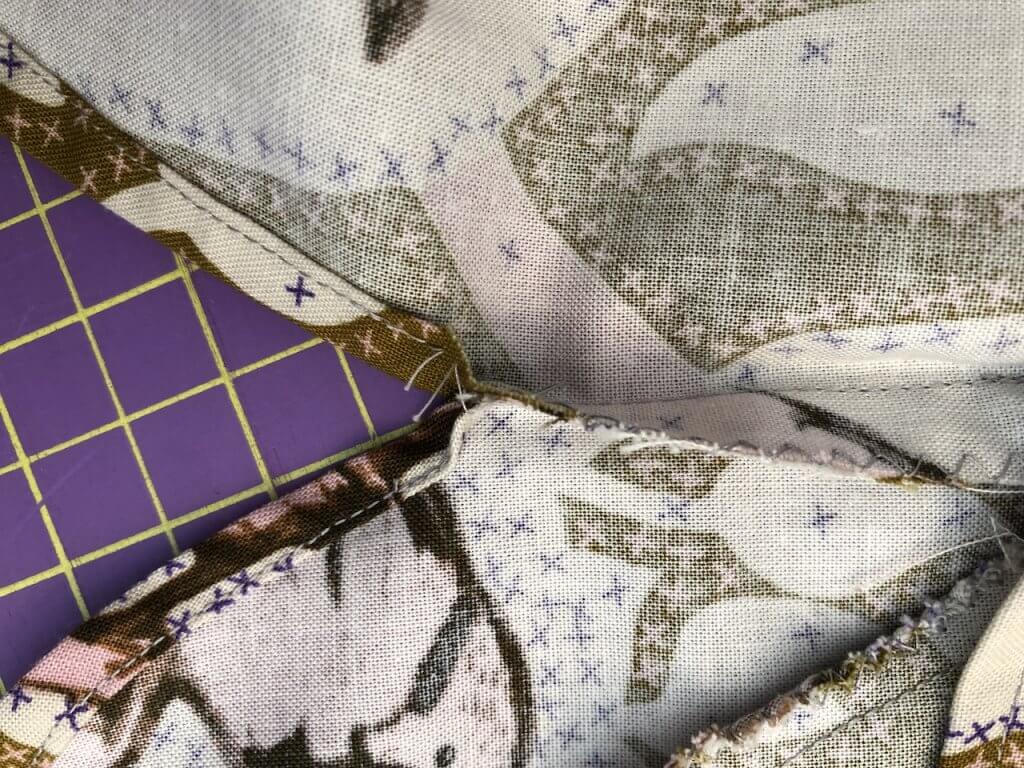
You can see that the side seam is finished with a zig zag, right? But then, I am moving from the side seam to the curved hem. That needs to be hemmed with a 1/4 inch fold, and then folded another 1/4 inch and sewn down. It suggests that I clip the seam allowance so that there is a separation between the two, and I can much more easily fold my hem down.
So what’s the problem?
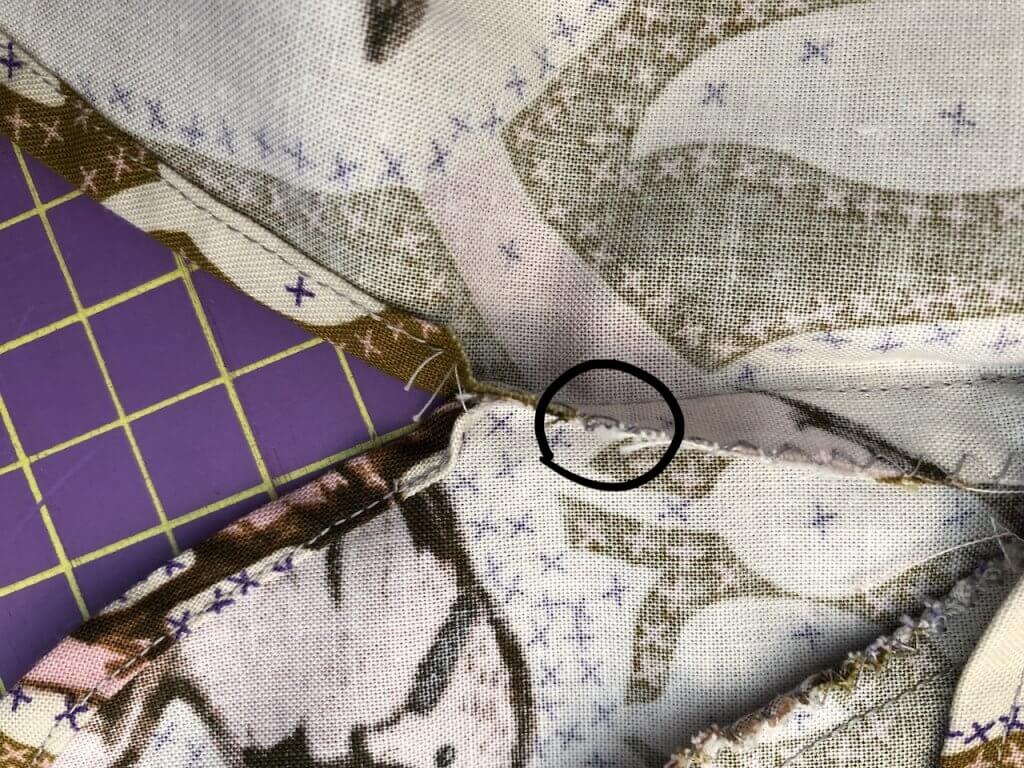
If I add a clip right below the seam allowance, it will cause a weakening in the point of the skirt that will get a lot of stress. The side seam that joins the front and the back, at the hemline is a stress point. Sitting, standing, climbing in and out of the car, it will cause wear and tear in this area.
So, what I did was zig zag the side seam and then transitioned to a small 1/4 inch hem. This leaves a mess right here.
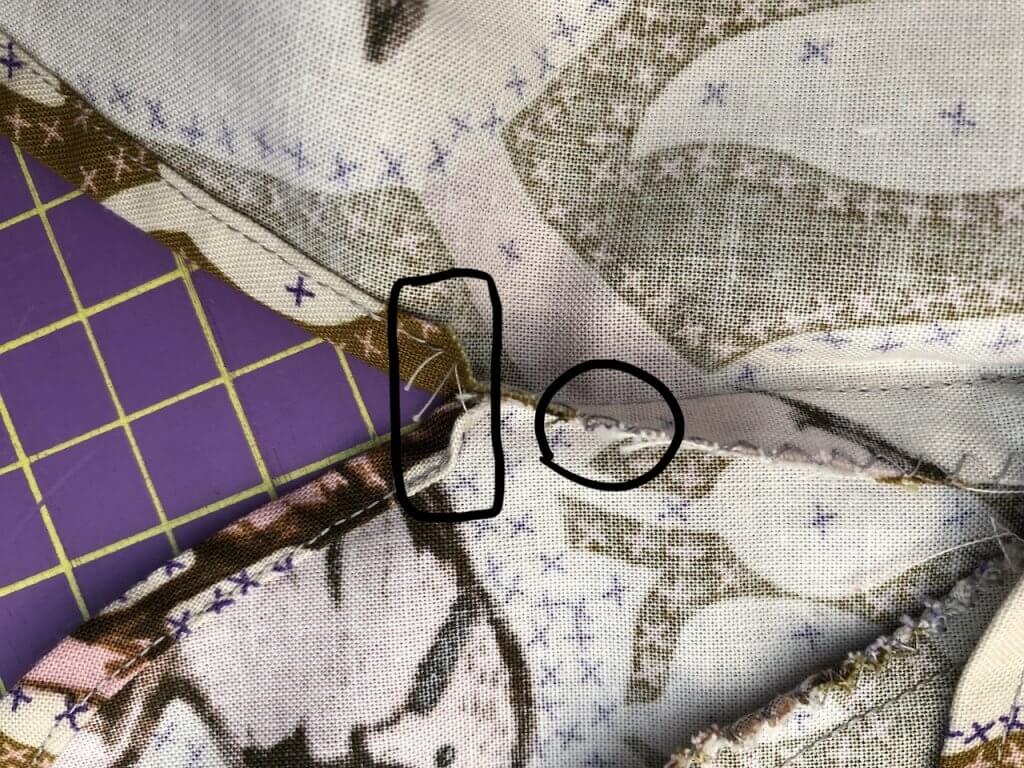
There’s an unfinished edge where the side seam joins the hem. So, what is wrong with that you ask? Well, when this gets thrown into the wash machine time and time again, it will ravel, causing a weak area right at the stress point. Will it ravel a ton? No, probably not. But, it’s enough of a concern that it needs to be rectified.
So, here is what I could have done–this is the opposite side seam.
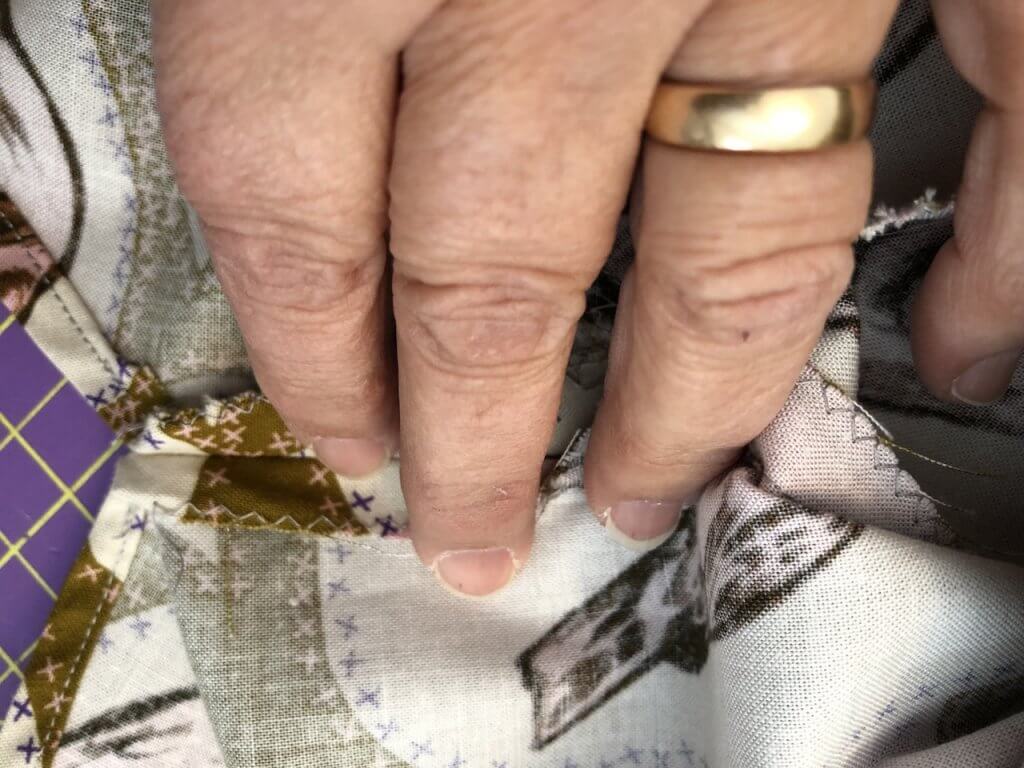
On this side, instead of joining the seam allowances I finished them separately and opened the seam allowance then made my hem. That’s an okay solution but it still isn’t perfect.
So, I made a second skirt and decided to line it. This turned out much better. Oh, I will still wear the other one. It’s super cute and it is all finished off now. But here’s where the lining makes things better.
Let me show you the photo of the finished skirt and then briefly we will talk about what it takes to line it.
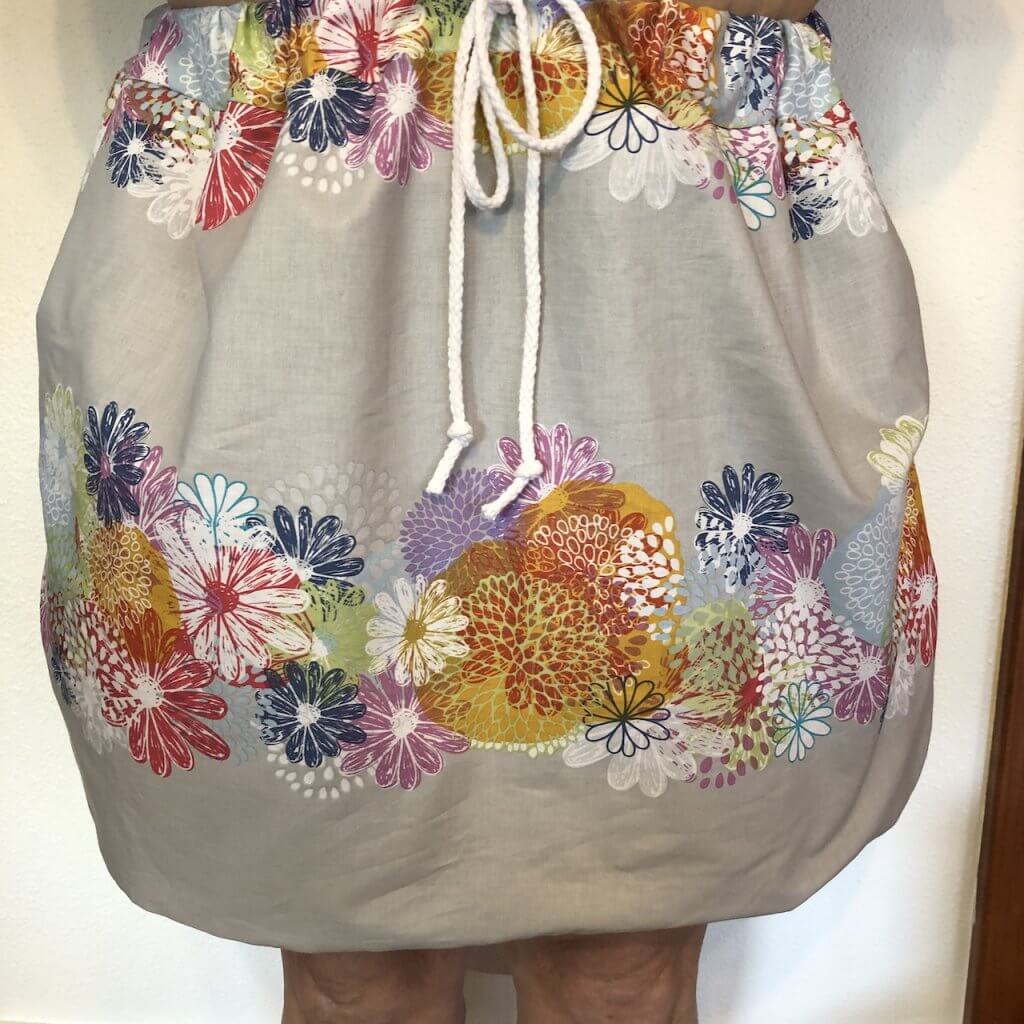
I love how it turned out, and the lining adds a finished look to it.
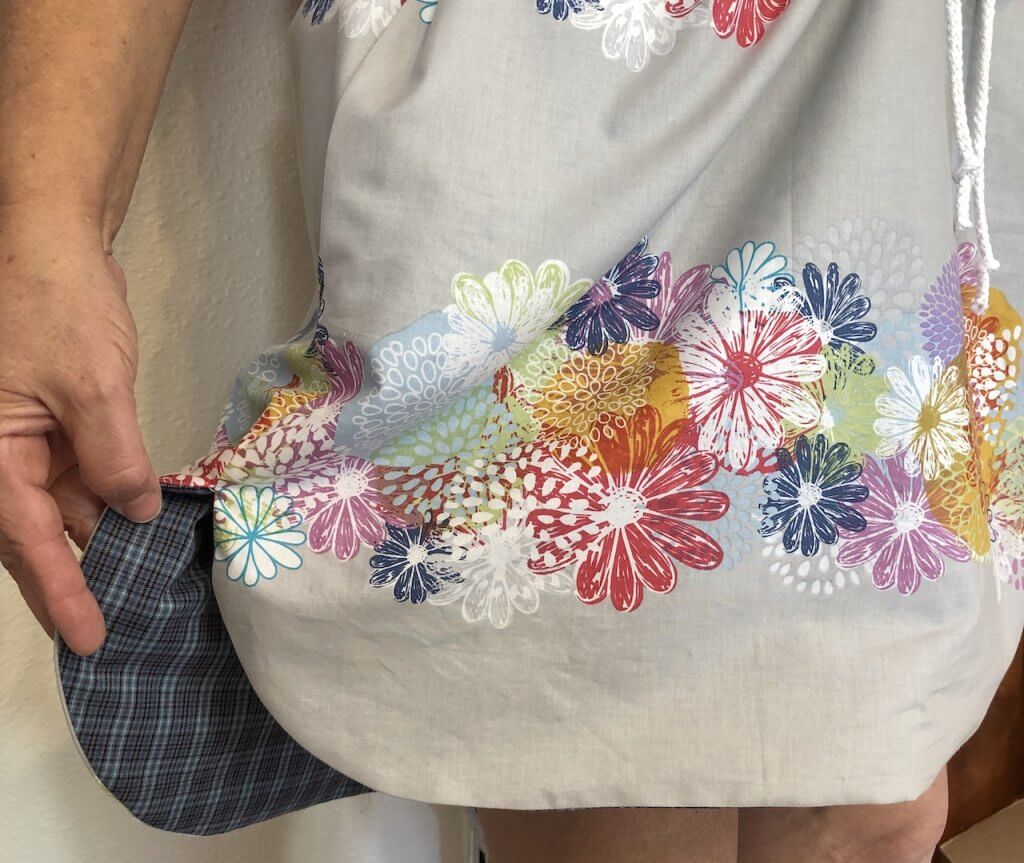
Since the back is longer than the front, the lining will definitely show, so I wanted to use a cute coordinate.
When you want to line something you first need to think about how you are going to turn it right sides out. This can be a conundrum. There are simply somethings that you just cannot line, because they can’t be turned right sides out when you’re done. But, there are some things that you can partially line. It takes some forethought, and some experience, and a few go rounds with the seam ripper. This skirt was easy to line because I had a skirt front and a skirt back. I made them out of the main fabric and then out of the lining fabric. I didn’t need to line the waistband. I lined the front and the back by sewing the completed front and back main fabric to the front and back lining fabric by putting them right sides together and then turning them right sides out. I pressed, and then added the waistband.
Start out with something simple. Make a halter type top and line it. Or make a simple skirt with just a front and back and line it, and then turn the top under and put in elastic. Just start small.
You could make a pair of pj bottoms and line them. You would simply make one of the main fabric, and then one of the lining. Put the main fabric of the bottoms right sides together with the lining, you know, slipped inside each other. Then sew them together at the bottom of the legs. Turn them right sides out and shove the lining down into the main fabric. Then add a waistband. It’s really that simple. Start small and get a feel for it.

