I found tips even inside the “learn to sew” pattern used for this. I put them into practice. All the tips are listed below, then the photos for each one follow.
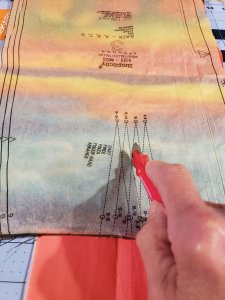
- DARTS: This skirt has ’em! The pattern discusses how to eliminate the “bubble” typically created at the very tip of the dart. This was a new learning for me!! First, trace the darts onto the wrong side of the skirt with tracing paper and a wheel. This is the BEST way to get perfect darts. Then, when you sew the dart, start at the wide end of the dart, and sew to the point… and then beyond it a bit, along the fold line. Just a bit though, so that the tip of the dart sort of melts into the fabric and the bubble will not appear. Then, DON’T BACKSTITCH. Cut the threads so you can tie them together in a knot. Press the dart itself , then press it in toward the center of the fabric. They recommend pressing the dart itself first as a way to “set the stitches.” Mine turned out so nice!
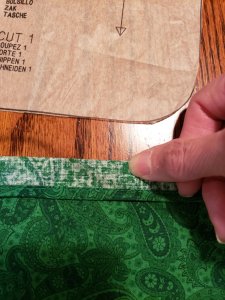
2. QUICK PRESS VS. USING AN IRON: When you want to quickly “press” part of a seam, or a dart, or a narrow hem, use your thumbnail vs. an iron. This works best on cotton fabrics. I tried it on satin and it’s not as easy. But you quilters always work with cottons, so you’ll have luck with this. Open the seam, or measure up the narrow hem, and just make creases with your thumbnail. Press it later. This will get you through multiple sewing steps faster.
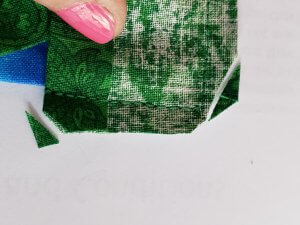
3. CLIPPING CORNERS OF A WAISTBAND AFTER SEWING BUT BEFORE TURNING: Clip the upper corner and then also the bottom corner. Typically patterns don’t recommend clipping at the bottom. But I do it because it reduces the bulk of the seam when it’s turned in, and also eliminates it from showing inside the waistband.
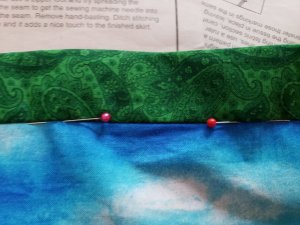
4. STITCHING THE WAISTBAND ON THE INSIDE AFTER YOU’VE TURNED IT. Guess what – this is the best tip I got from the pattern. Normally, when you turn the waistband to the inside, I have used a hand-done slipstitch to close it all up. The pattern recommended “stitching in the ditch”. It requires some accurate pinning of the folded edge of the waistband to the waistline seam, but makes for a much more professional looking waistband. Try it – it gets easier the more times you do it.


