Instructions for Mount Crumpet
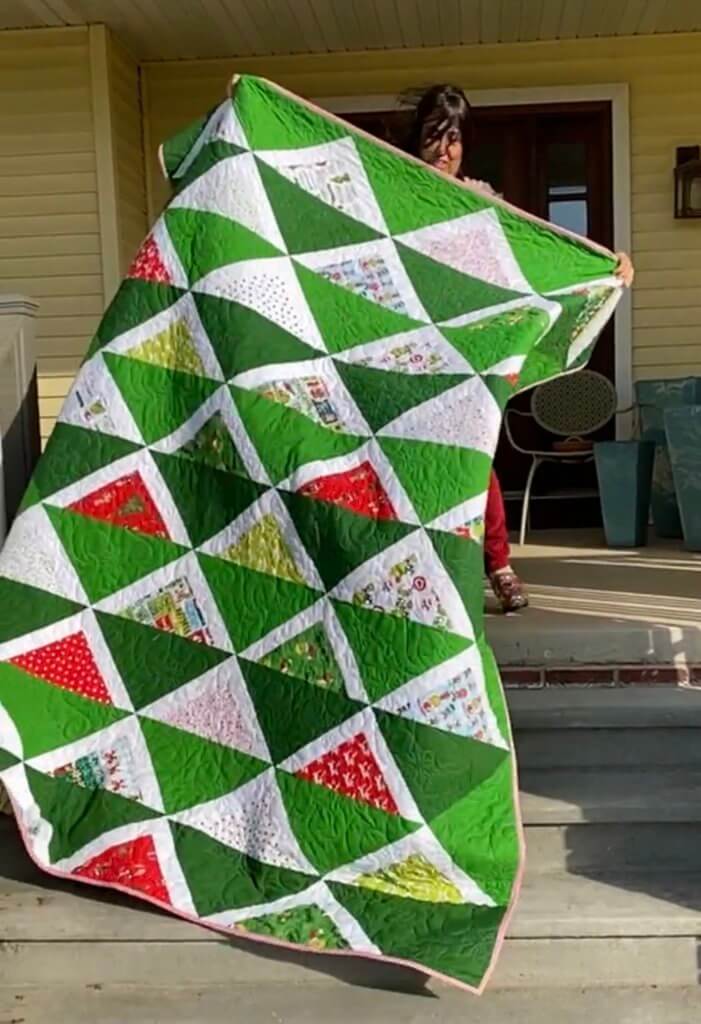
This is a quilt made with a layer cake. It’s simple, uncomplicated and easy to do. Cut the Layer Cake in half on the diagonal, and you’re partway there.
All seam allowances are 1/4”.
Finished Size: 72 1/2’’ x 92 1/2’’
Finished Block Size: 12 1/2’’
Materials:
1 Layer Cake
2 yards solid light green
1 yard solid dark green
2 yards solid white
5 1/2 yards backing
5/8 yards binding
2 1/2 yards quilt batting 80-90” wide
Cutting:
White:
- From the solid white cut 27 strips 2 1/2’’x WOF.
2. From each of 18 white strips subcut; 2 rectangles 2 1/2’’ x 12 1/2’’ and 1 rectangle 2 1/2’’ x 15 1/2’’.
3. From each of 9 white strips subcut; 2 rectangles 2 1/2’’ x 15 1/2’’
Layer Cake:
Cut 18 squares from a layer cake on the diagonal, from opposite corner to opposite corner. This will yield 36 triangles.
Note: To make this with fewer repeating prints and more variety, you can cut more of the layer cake squares on the diagonal. You will need 35 printed triangles for this quilt.
Note: They will now have a bias edge. Handle them like a delicate piece of pie crust.
Dark Green:
- Cut 4 strips 13 1/2’’ x WOF. Subcut the strips into 10 squares 13 1/2’’ x 13 1/2’’.
- Cut the dark green squares on the diagonal to yield 20 triangles. Label them Main Triangles.
- Cut 2 squares 9 3/4’’ x 9 3/4. Cut each square on the diagonal to yield 4 triangles. Set these aside for the corner triangles and label them Corner Triangles.
Light Green:
- Cut 2 strips 13 1/2’’ x WOF. Subcut into 6 squares 13 1/2’’ x 13 1/2’’.
- Cut the light green squares on the diagonal to yield triangles. Label them Main Triangles.
- Cut 3 squares 19’’ x 19’’. Bisect each square x 2 along the diagonal, for 4 triangles from each square, to yield 12 triangles. Set these aside for the side setting triangles and the setting triangles along the top, and label them setting triangles.
Sew the Blocks:
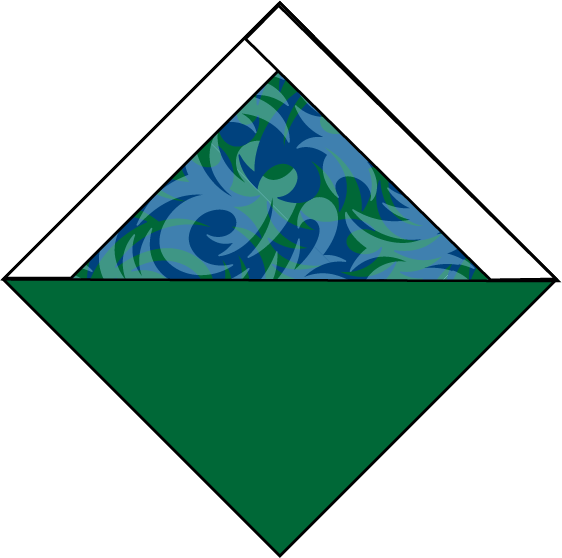
- Stitch a layer cake triangle RST to a white 2 1/2’’ x 12 1/2’’ rectangle along one of the short sides, right sides together. Start the seam at the corner with the right angle. There will be a tail hanging from the end. Press the seam allowance open.
- Stitch a 15’’ rectangle right sides together to the unit above, along the adjacent side, starting at the corner that is a right angle. There will be a tail hanging off the end.
- Press seam allowance open.
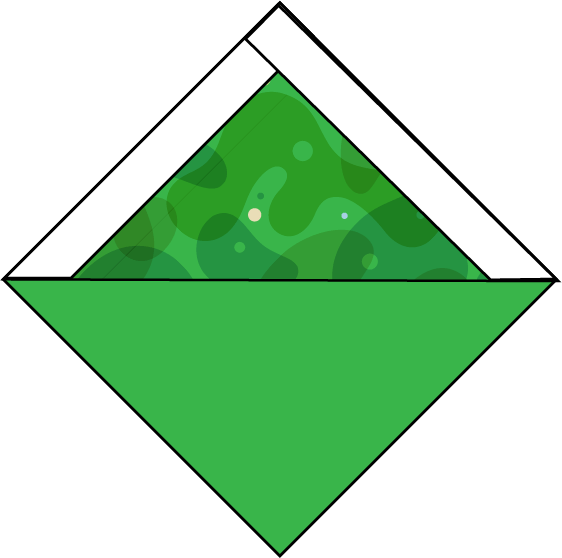
- Trim as shown below.

5. Repeat for 35 layer cake triangles.
6. Join a dark green Main Triangle to a layer cake unit along the long side of the triangle, right sides together and stitch. Press seam allowance toward the green.
7. Repeat step 6 for a total of 20 blocks.

8. Join a light green Main Triangle to a layer cake unit, right sides together, and stitch along the long side of the triangle.

9. Repeat step 8 for a total of 12 blocks. Press seam allowance toward the green.
10. Lay the blocks out as shown in the image below, placing the setting triangles along the edges.
11. There are 3 layer cake units that will go along the bottom row to create the last row of mountains.

Stitch the diagonal rows together:
- Using the first triangle from the left side of the layout, the first block, and the first triangle at the top of the setting triangles, make a row. Stitch these three right sides together and press the seam allowances all in one direction.

2. Repeat with subsequent diagonal rows until all of the rows have been sewn together. Alternate the direction of the seam allowances when pressing.
3. Sew the corner setting triangles onto the 4 corners. Press the seam allowances inward toward the center of the quilt.
4. Square up your quilt so that all the side edges are even.
Finish:
- Layer, quilt and bind in your preferred manner.

