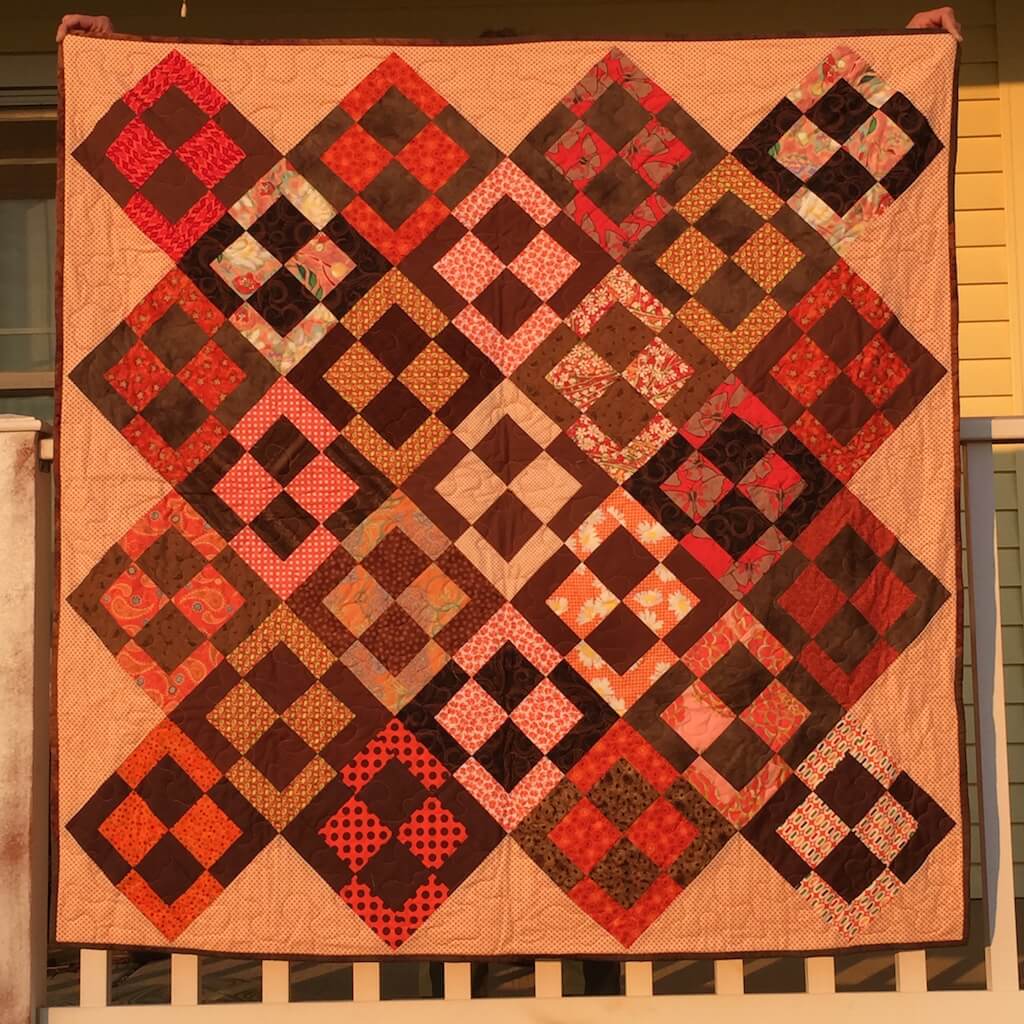
This is one of the first quilts that I ever made using my template cutting system. The fabric is a little dated. I definitely need to update it. The cutting system makes light work of your scraps. This happens to be a monochromatic quilt–as brown is a shade of orange. I felt like I needed to revisit this quilt today, as I have been contemplating just which layout to use for my next one. You see, there are so very, very many different layouts that one can use. It’s such a versatile block. It requires the contrast of lights and darks to make it really sing out. Let’s look at how and why it’s so fun and easy to construct.
I have done countless demonstrations all over the country on the cutting system. In fact, I demonstrated this system to the acquisitions editor at C&T Publishing, and she signed me right up for my book contract.
Here’s how it goes.
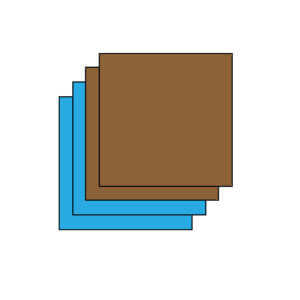
First off, you need to grab your scraps and start ironing. Iron them nice and flat, and then using a 5 1/2” template, cut 2 each of 2 colors. Two should be light, and two should be either medium or dark. Or, two can be medium and two can be dark.
****All seam allowances are 1/4 inch. *******
Layer them so that all of the edges match up.
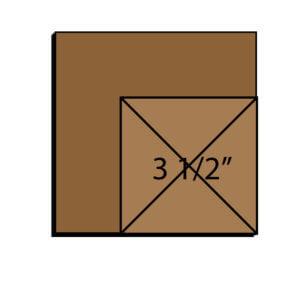
Lay a 3 1/2” template into the lower right corner. Make sure that all of the edges are lined up with the edges of the fabric, and that none of the fabric has shifted.
Lay the 5 1/2” template next to the 3 1/2” template so that they are snugged up against each other.
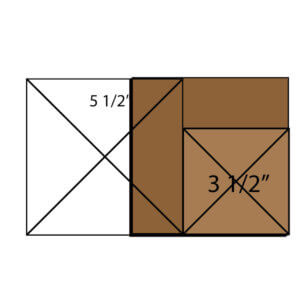
Remove the 3 1/2” template without moving the 5 1/2” template. Cut alongside the 5 1/2” template using a rotary cutter, making certain to cut through all of the layers of fabric.
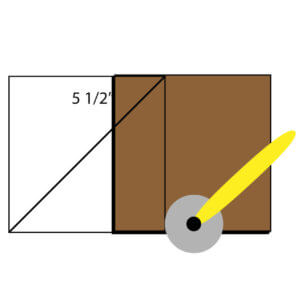
After you have made the cut, you will have 2 rectangles. Place the 3 1/2” template back onto the larger of the two rectangles and cut across the top, being careful not to allow the fabric to slip. It must remain stacked.
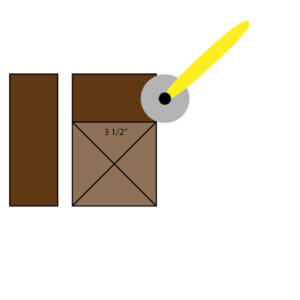 There are 2 rectangles and one square. 1 rectangle measures 2” x 5 1/2”, one measures 2” x 3 1/2”, and the square measures 3 1/2” x 3 1/2”. If you don’t have templates for doing this stack and cut method you can cut your pieces to these sizes.
Remember that at this point you will have 4 pieces stacked of each of these sizes.
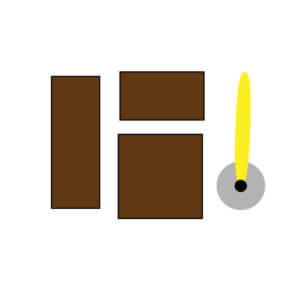
Unstack your pieces.
Place right sides together and using a 1/4” seam allowance sew:
- One light colored rectangle 2” x 3 1/2” to one dark square 3 1/2” x 3 1/2”.
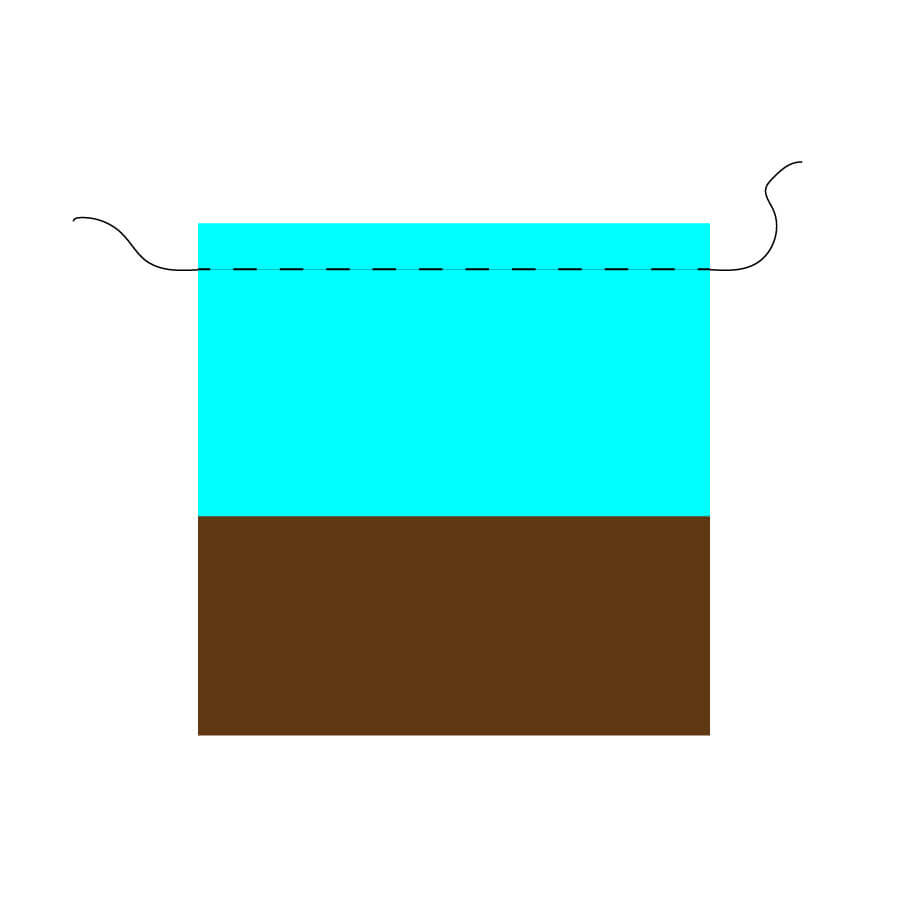
- Repeat this 4 times, each time sewing the light rectangle to the dark square, and the dark rectangle to the light square.
- Open out, and press the seam allowances toward the dark square.
Time to sew the long rectangles!
- Stitch a light rectangle to the unit made above. It can be sewn to either the left or right side. Repeat with the other light rectangle and dark square.
- Repeat step one with the dark rectangles and the light squares.
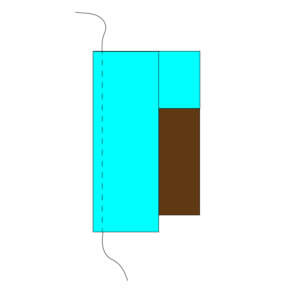
- Open out and press the seam allowance toward the dark fabric.
Note: you will notice that the long rectangle extends beyond the square. This will all be trimmed.
Now for the trimming!
- Find a 4 1/2” acrylic template and lay the template over the unit making certain that it is centered. In order to center it, line the edges of the template up with the square in the unit.
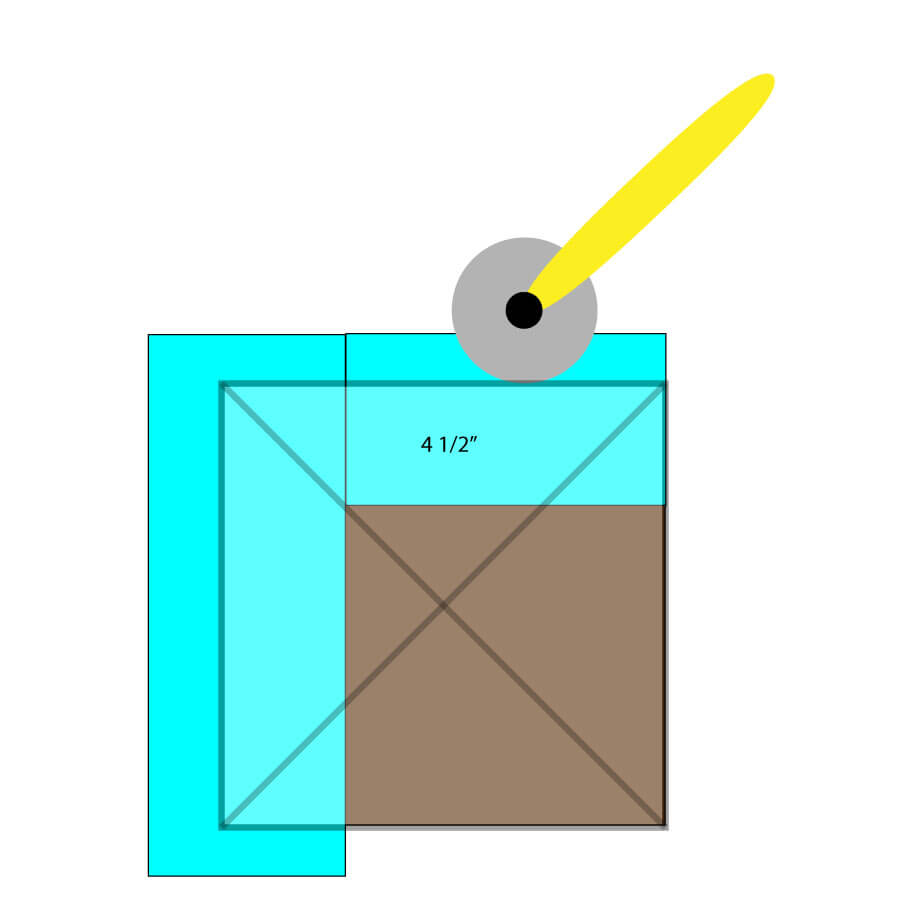
Repeat the squaring with all four units.
Ready to sew into a 4 patch, and let the fun begin!
- With right sides together, sew a unit with a dark square to a unit with a light square, matching the squares as shown in the photo below. The rectangles will be lined up with the rectangles of the opposite piece. Note that the photo shows them slightly misaligned, but that is for instructional purposes only, to show the two blocks being sewn together.
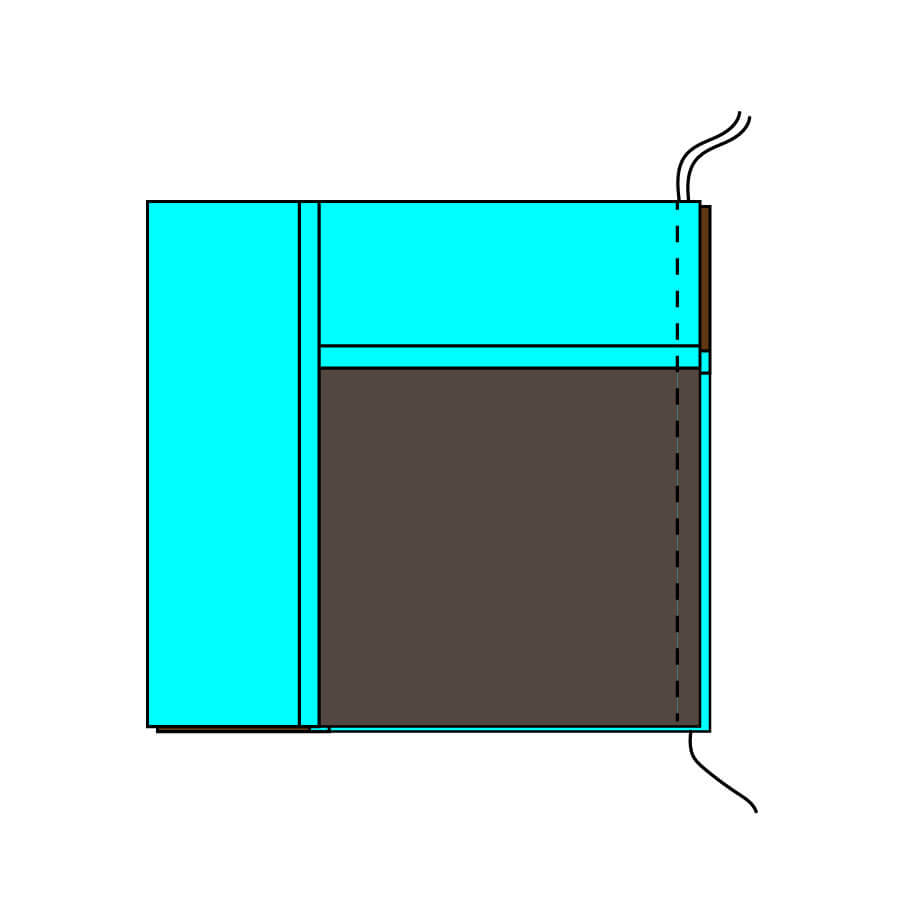
Open out and press. Your new unit should look like this:
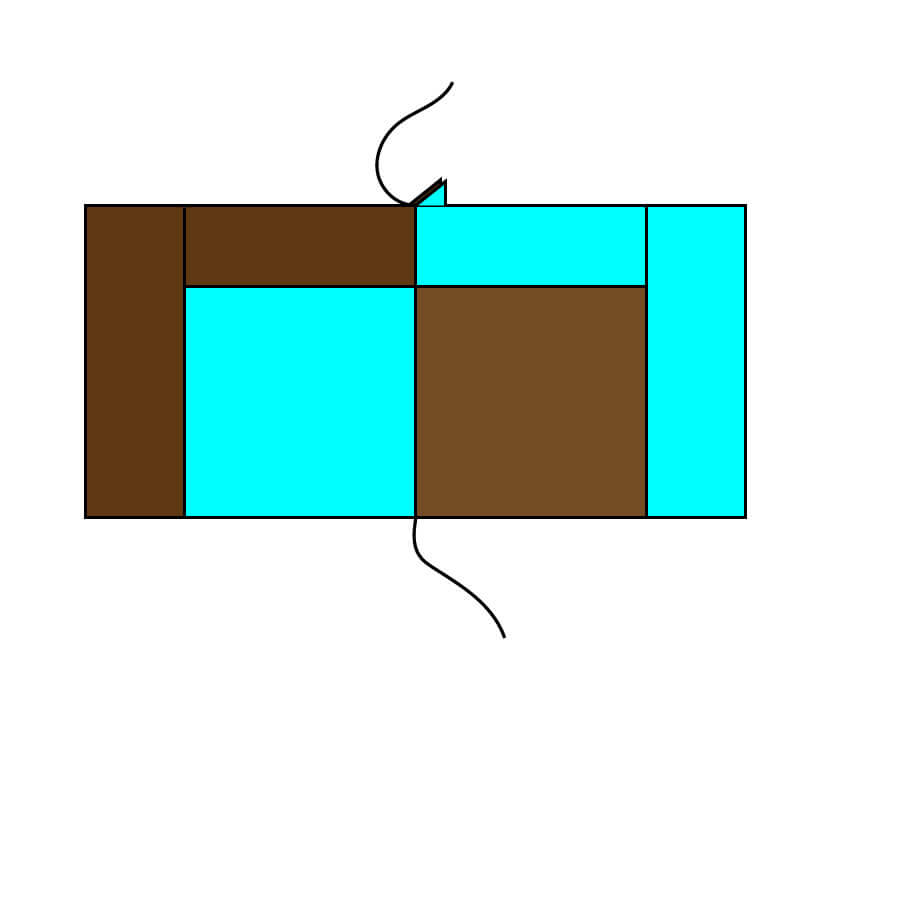
Make a second unit using the remaining blocks.
Join the two units by sewing them right sides together. Match the center seam allowances.
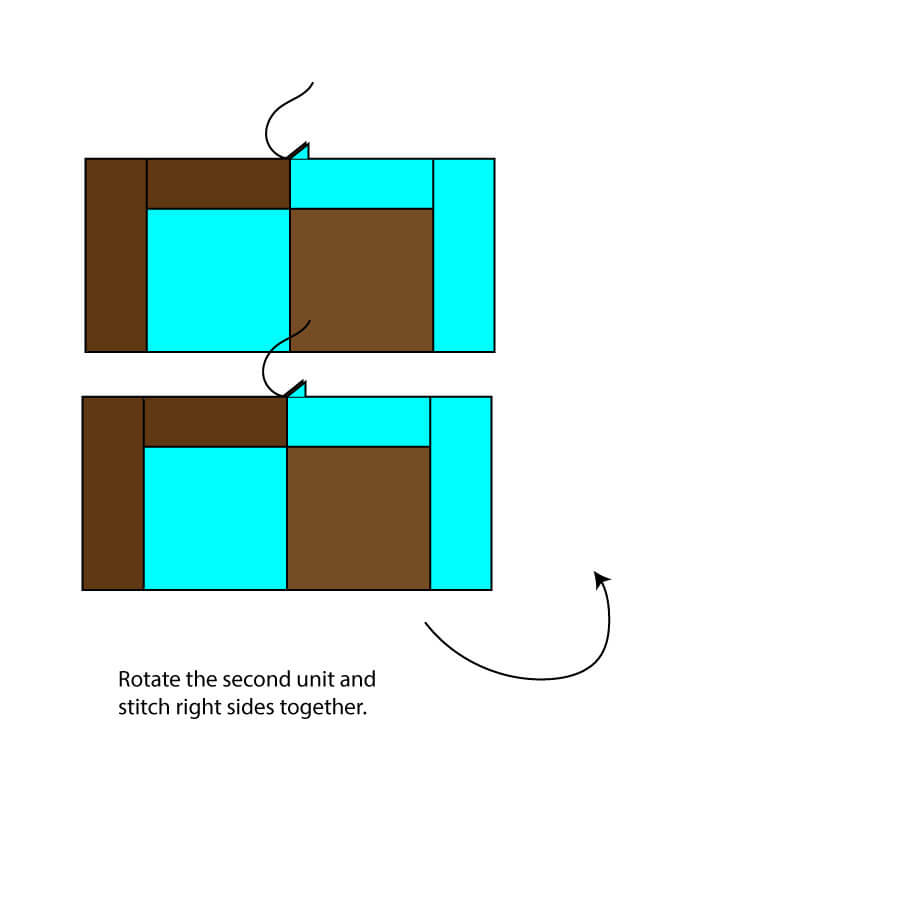
Open out and press the seam allowance to one side.
Now you have a treasure box block.
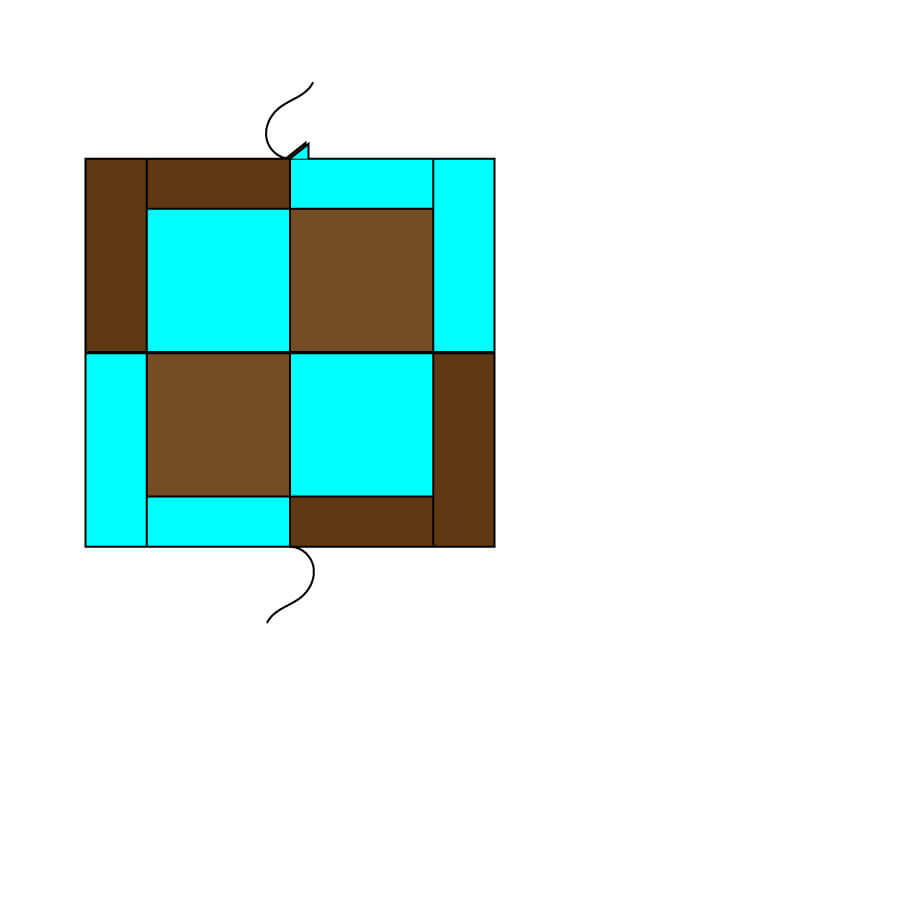
Check out the newest blog post that talks about the different ways in which to lay this block out.

